Your Quality Improvement Plan (QIP) is located in the blue navigation banner
The QIP function contains all the information collected during the “Add Issue” button while auditing. Wherever you have added 'Common' or 'Custom Issues' during an audit, they will appear here.
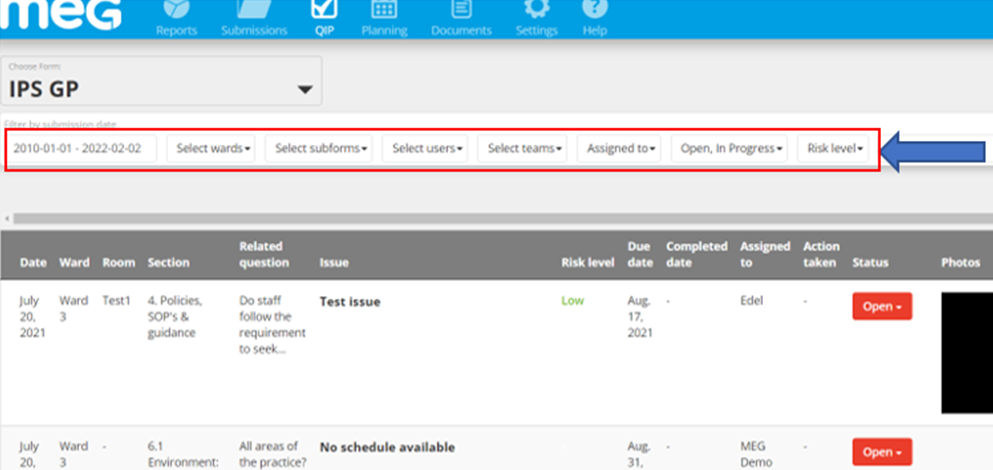
To collate the issues you have identified during an audit;
1. Identify the issues form you have submitted in the form selection dropdown
2. In the filter bar choose (if applicable) - date range, location/ward, subform, user, teams, assigned to, status
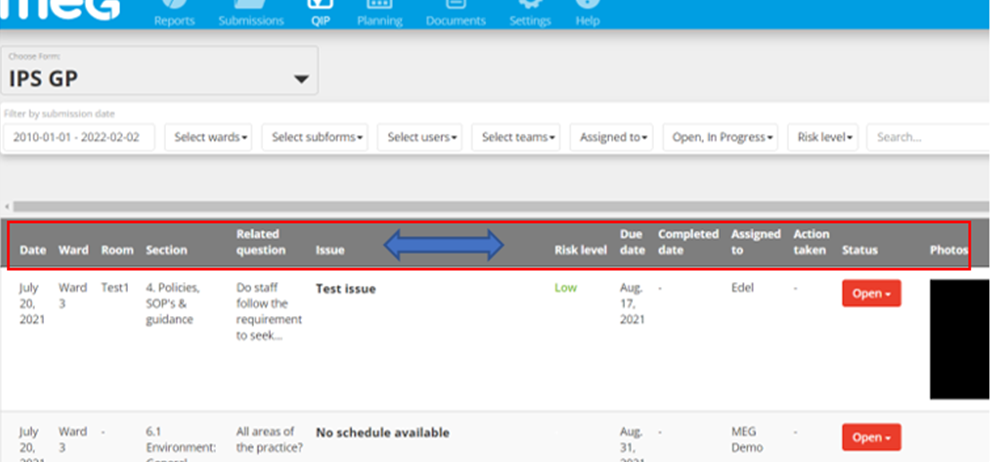
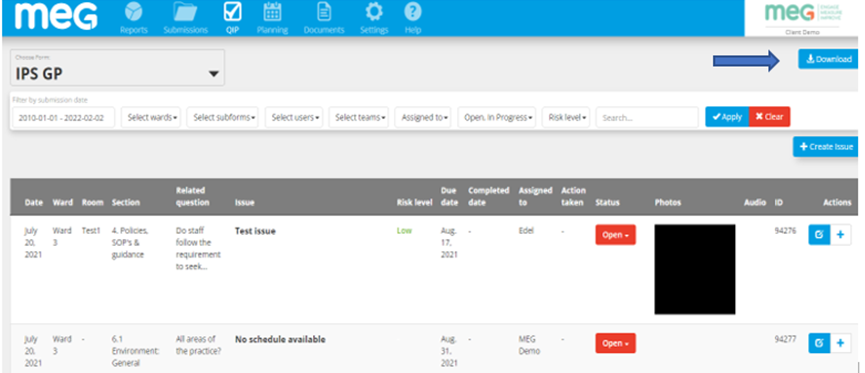
In relation to the QIP table, you will see there is a list of headings in the very first row.
Date - Click to open the pop out calendar and sorting date options
Issue Highlighted - the issue you have identified be it from “Common Issues” or “Custom Issues”
Risk Level - High, Moderate, Low, Commendation
Related Questions - Question that the issue is related to in the audit
Location - What area you selected at start of the audit
Room - if the auditor identified a room during the audit and added it in the “Issues Identified” when adding an issue
Auditor - Auditor
Section - Which Subform you identified the issue in
Due Date - Date you wish to have the issue completed by
Completed Date - Date Completed
Action Taken - What action was taken to resolve the issue
Status - Open/In-Progress/Closed
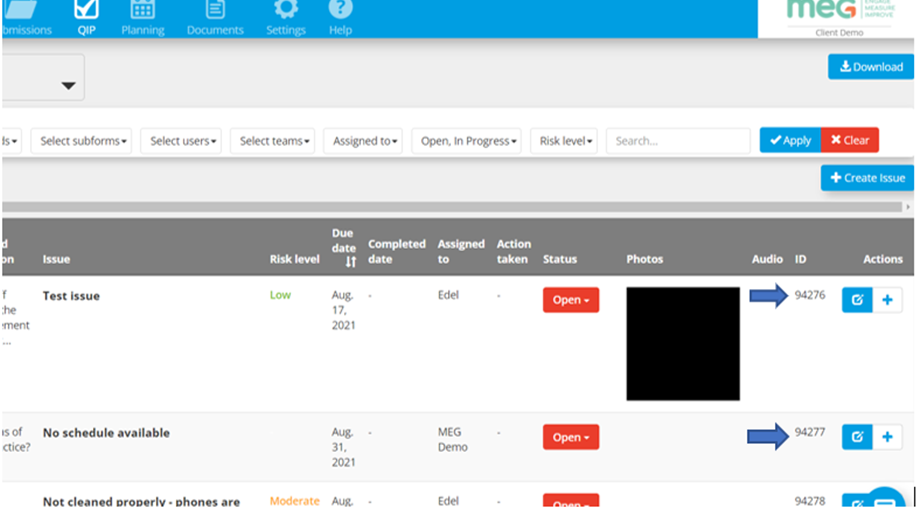
Actions - The button in blue allows you to access the details of the issue in one page - to edit all the above details please click on the blue button. The “+” button allows you to add Sub Issues - Sub Issues break the main issue into smaller issues if the task identified needs input from a larger cohort.
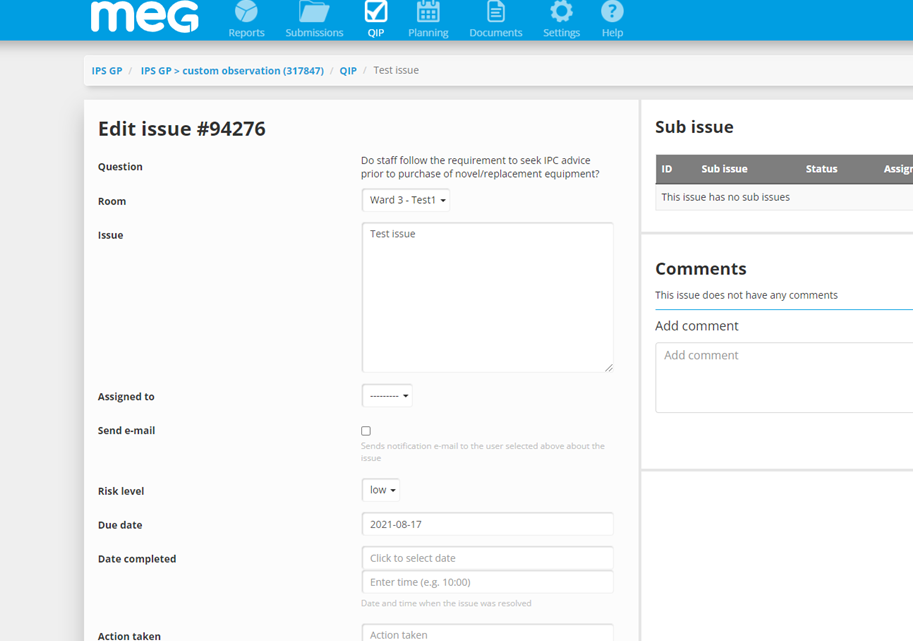
Once you click on “Edit Issue” (blue button) you can now edit all the information collected during the audit. Please note that you might have to request permission to edit issues.
As well as the fields above such as Room, Comment etc., there are others that may need more details, such as:
Assigned to - Assign the issue to an identified “Issue Handler”, someone who is responsible for taking measures to resolve the issue. The Issue Handler can be added by your Hospital MEG Administrator or a member of the MEG Customer Support. Whenever an issue is assigned to them, an email will be sent to the Issue Handler or if the “Issue Handler” has a MEG account, this person can log in and investigate the issue further.
Sub issues - This will let the user add smaller issues to the main issue and break the issue up into smaller sections. If a “Sub Issue” is completed for this main issue, it will show here.
Comments - This is a dialog box to allow you or other colleagues to add comments to the issue and allow an open conversation between you and your team.
Risk level - Low, Moderate, High, Commendation.
Due date - The date you want the issue to be resolved by.
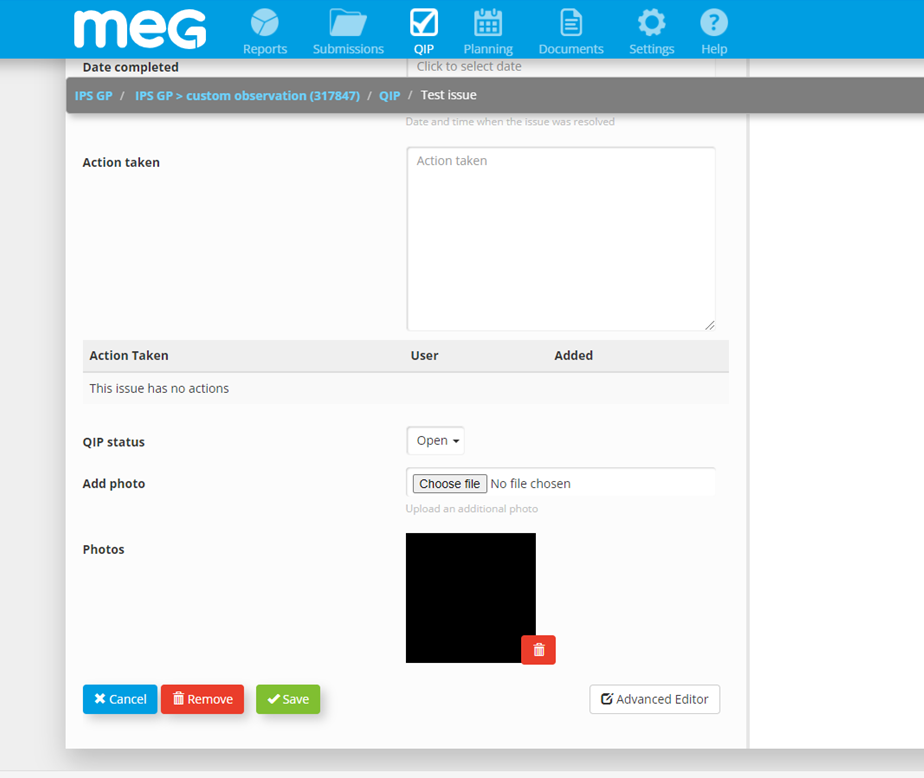
Action taken - Action that was taken to resolve the issue.
QIP status - Status of the issue: Open, In progress, Closed
On the Right of the screen we can see a Changelog that keeps track of any changes such as “Assigned To”, “QIP Status” etc.
At the end of the screen we can see “Add Photos”, “Remove Photos” and the Cancel, Remove and Save options at the end.
Going back to the QIP main page, “Download” will allow you to download the QIP table as an Excel spreadsheet
“Create Issue” allows you to create an issue outside a specific audit session and here on the QIP page where you can link it to an audit
-1.png?height=120&name=MEG%20high%20res%20strap_logo%20(trans)-1.png)